How to Install Python on Windows 10
Do you want to learn how to install Python 3.10 on Windows 10 Computer in depth so you can install it in any computer without help. Then, you are at the right place, just keep reading till the end and you will be able to do it yourself.
What is Python?
Python is a powerful, flexible and versatile programming language, it is being popular choice for both beginners and experienced developers these days. Most of the companies are looking for experienced python developer. If anyone wish to make career in automation, data analysis, data mining, machine learning, artificial intelligence, back-end developer then it is mandatory to have python programing skill in your arsenal. Before learning any programing language it is mandatory to learn how to setup its working environment. Therefore, in this tutorial you’ll learn how to install Python 3 on Windows 10 or Windows 11 or any other Windows OS.
Which is best Anaconda Python or Official Python?
There are mainly two ways you can install python on Windows, first using Official Python Installer and another way is using Anaconda Python Installer. Well Anaconda is a distribution of the Python programming languages for scientific computing, that aims to simplify package management and deployment. The distribution includes data-science packages suitable for Windows, Linux, and macOS. The most obvious difference between both is that Anaconda have pre-packaged lots of data-since related library included in the installer, therefore, the installer size is more than 750MB but it can be installed in offline PC and no need to install packages manually as it has already pre-packaged. So lets begin.
Prerequisites
A Windows 10 installed computer with administrative privilege to install python and a internet connection to download python installer.
Official Python Installer
First we will learn how to install python using Official Python Installer. If you are little experienced with computer programming and have always available Internet connectivity with your system then you can use this step otherwise I will suggest to go with Anaconda Python Installer.
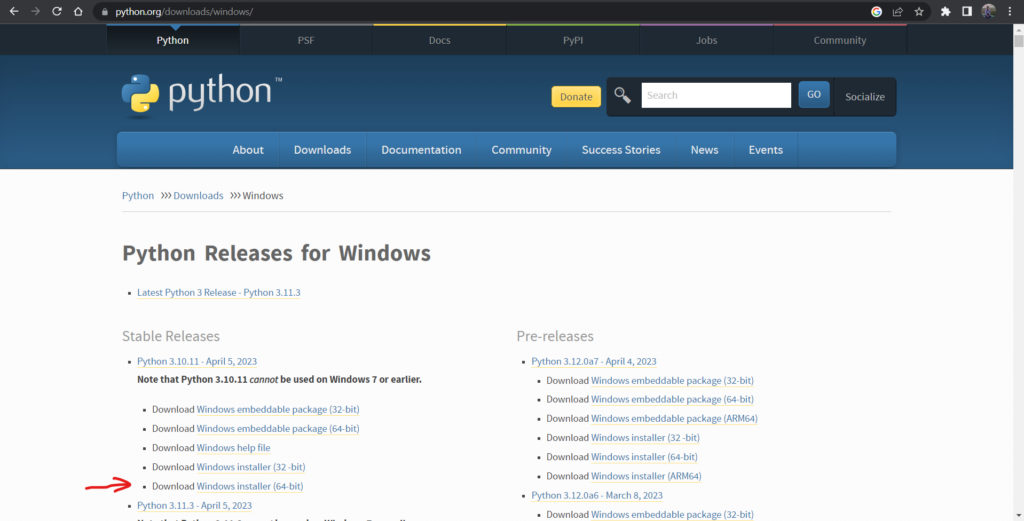
Step 1 – Download Python Installer
Go to www.python.org/downloads/windows and download the installer as per your system. For example I am using Windows 10 64bit version, therefore, I will download python installer which should mention Windows 10 or Windows and also 64bit with it. As you can seen in the image below.
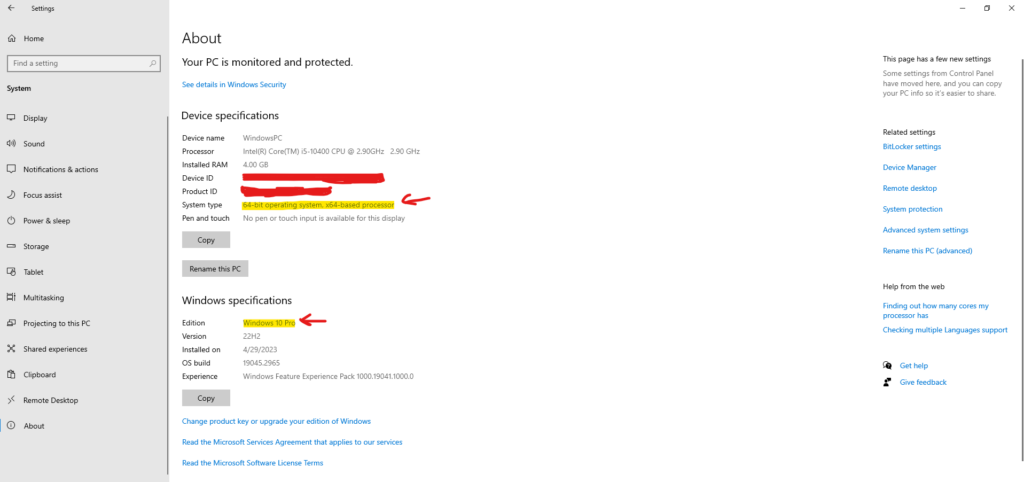
If your PC doesn’t support 64bit and you have 32bit version of OS installed you should download 32bit Python Installer. If you don’t know which version Windows OS you have installed you can check it by going at “Start -> Settings -> System -> About” as shown in given below image.
Step 2 – Installation & Setup
Double click on the installer downloaded in previous step, it will ask you for administrative privilege if you have administrative password to enter, please enter the password and allow the installer to run. Installer will pop up like given image below.
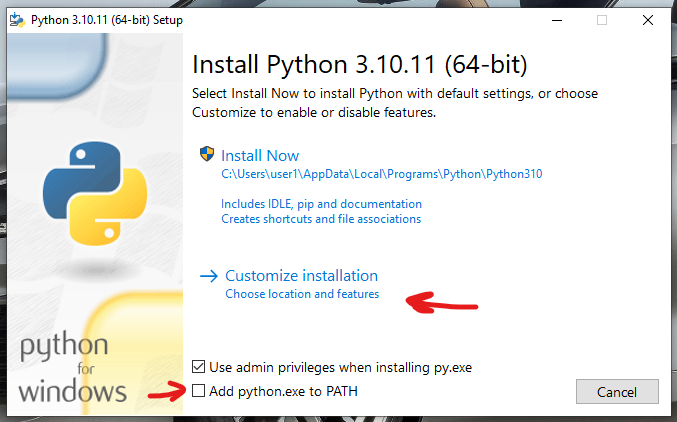
Now check on the option “Add python.exe to PATH” and click on “Customize installation” option. Then the next screen will be as below image where you can set optional features of the python installation.
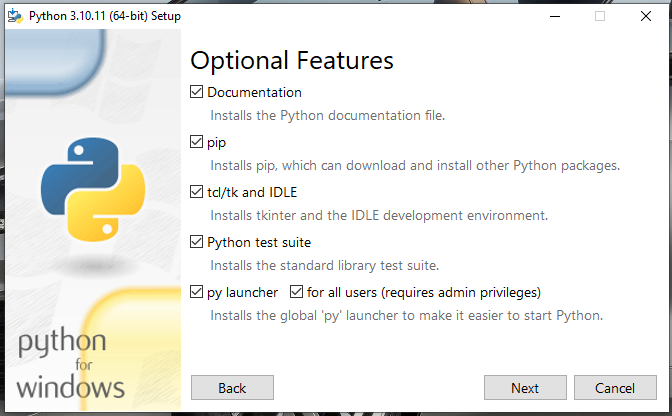
Check on all the option and click on next button. A new screen will show like image given below where you can set advance option for the python installer.
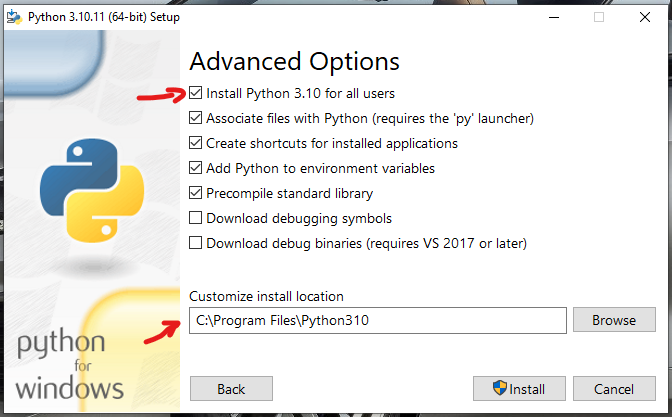
Now on this screen you should check on “Install Python 3.10 for all users” if you wish to install python for all users otherwise let this screen as it is. One more thing you can do on this screen is to “Customize install location” here you can set the installation directory of the python installation.
For example, if you don’t wan to install python in C: drive and want it to be installed at D: drive, you can simply click on “Browse” button and select the folder of your choice to set the installation location, or you can manually type the exact path in the path field. Now you can simply click on “Install” button to start the installation process. It will install the python as we have provided the options. If it ask for admin privilege please grant it by clicking on “Yes” option as shown in below image.
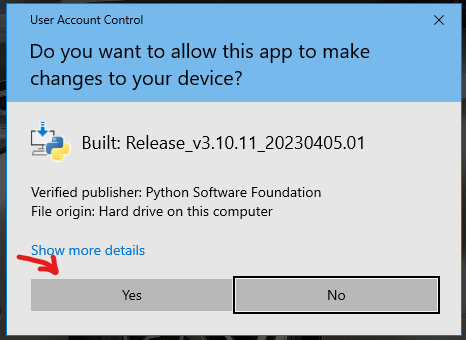
After clicking on “Yes” button installation will start and show a “Setup Progress option”. When the installation completed successfully a window will option as given below image.
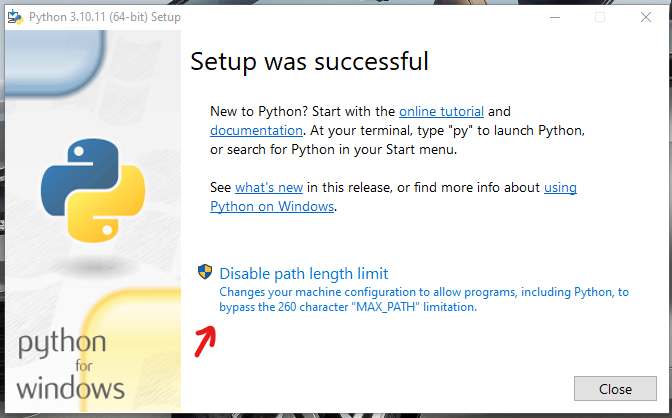
Click on the “Disable path length limit” if you want to disable Windows MAX_PATH limit. Then allow UAC prompt for administrative privilege otherwise you can click on the close button right away.
Step 3 – Testing
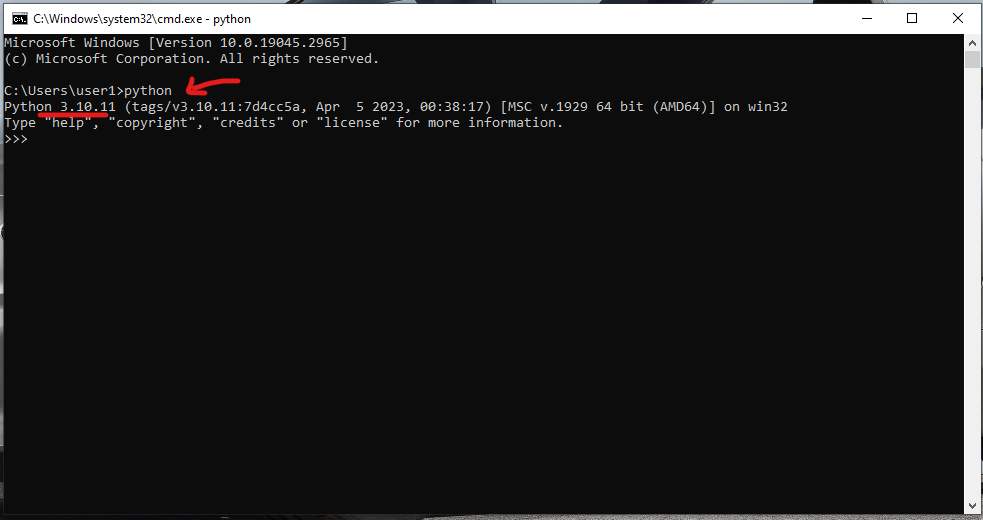
Finally you have successfully install python in your computer. Now you can test the installation by opening CMD from run prompt. Press Win+R to open run prompt. Then enter cmd in it and press enter to open Windows Command Prompt. In command prompt type python and press enter. If the installation was a success you should see output something like below image.
Finally everything is installed and setup as it should be. Now you can use your system to make you python projects. If you wish to install any python package you can use PIP in CMD as “pip install numpy”, here I tried to install numpy package using pip in python. Similarly you can install any package/library of python using pip just you have to change the package name from numpy to your desired one.
Anaconda Python Installer
Step 1 – Download the Installer
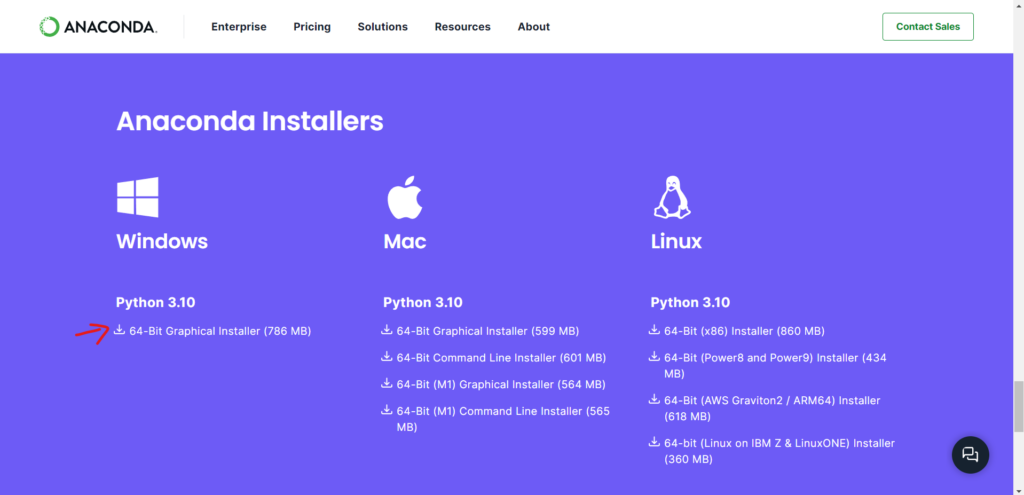
Lets first download the Anaconda Python Installer from the website www.anaconda.com/download as per your system. For example I am using Windows 10 64bit version, therefore, I will download python installer which should mention Windows 10 or Windows and also 64bit with it. As you can seen in the image below. If you don’t know which OS version you are using, you can find it here.
Step 2 – Installation & Setup
Once the download is complete, double click on the installer. It will ask you for administrative privilege if you have administrative password to enter, please enter the password and allow the installer to run. Installer will pop up like given image below.
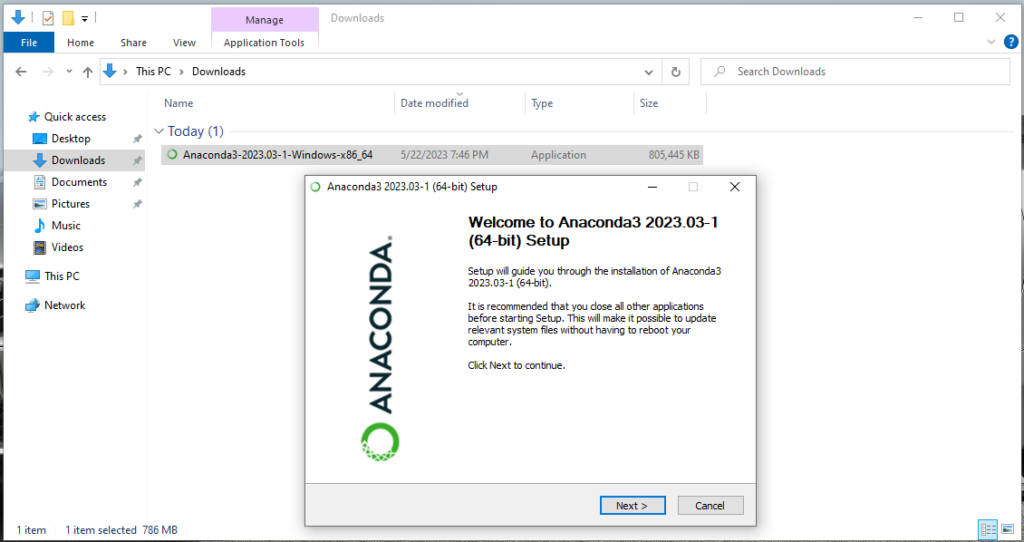
Click on “Next”. On next screen it will ask you to accept the License Agreement, click on “I Agree” to continue. Then a new screen will popup like below.
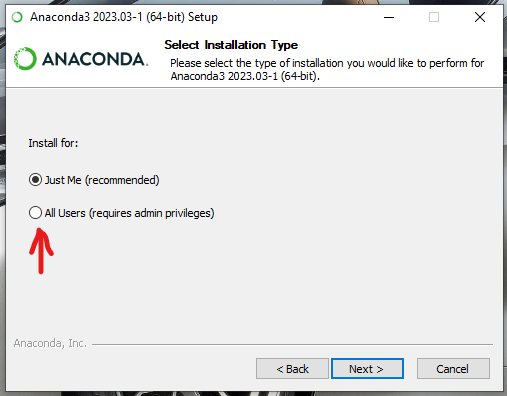
Select “All Users” option if you wish to install python for all users, otherwise you can let it on “Just Me” option. Now click on option “Next”, which will proceed you to the next screen as given below.
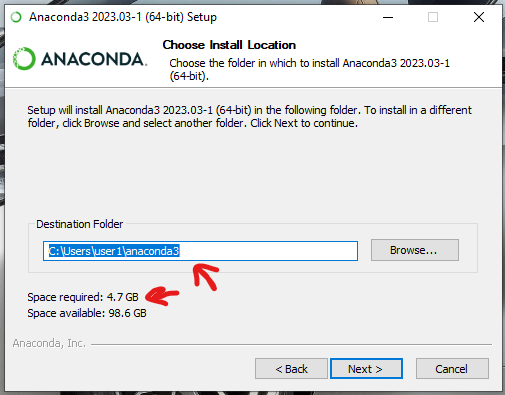
On this screen it shows that you need need at least 4.7 GB of free disk space. Destination Folder is where the entire Anaconda package along with python binaries will be installed, obviously you can change this path as well. Now finally click on “Next” button to proceed for final screen “Advanced Installation Options” which is like below image.
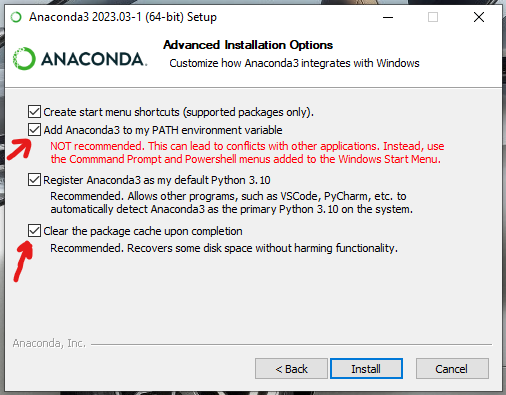
Check on “Add Anaconda3 to my PATH” option and last option as well. Now finally click on “Install” button to start the installation process. If UAC window pops up for administrative privilege please accept it. A progress screen will comes up which shows the progress of installation process. When installation completes successfully you should be greeted with “Installation Complete” screen as the image given below.
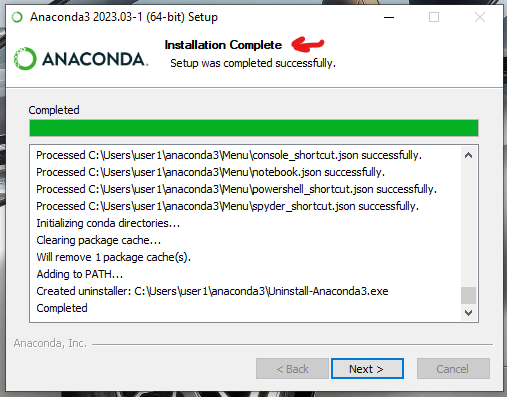
On this screen click on “Next” button and again “Next” button on next screen then finally click on “Finish” button to finish the installation.
Step 3 – Testing
Finally you have successfully install python in your computer. Now you can test the installation by opening CMD from run prompt. Press Win+R to open run prompt. Then enter cmd in it and press enter to open Windows Command Prompt. In command prompt type python and press enter. If the installation was a success you should see output something like below image.
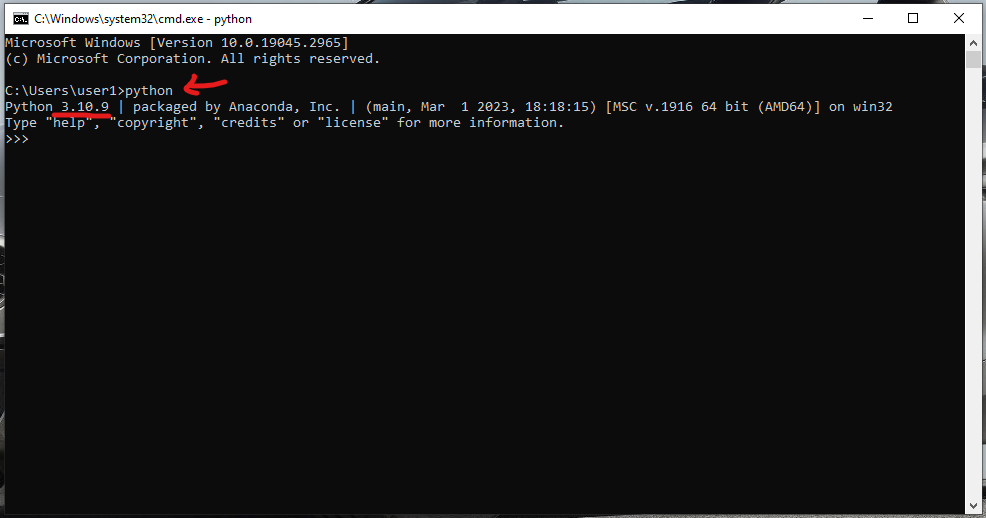
As you can see at this time anaconda comes with Python 3.10.9 by default, while official python installer comes with 3.10.11.
Conclusion
You have learn how to install Python 3 in Windows 10. With this guide you should be able to install python in both ways, either with official python installer or with anaconda python installer in any Windows OS. Now you have learned how to install python it is time to Setup Development Environment for Python.